


Fire stopping between floors is the sealing that keeps each storey of a building separate in a fire. Floors are meant to hold back flame and smoke for a set time, but every pipe, cable, duct and riser that passes through them leaves a hole, and every gap where a floor meets a wall or the façade is a possible route upward. Seal those properly and the floor performs as designed. Leave them open and the rating on the drawing means very little. Floors carry a particular burden in a fire. Heat and smoke rise, so a weakness in the floor above a fire is the fastest route into the next home or office. What follows sets out how much fire separation floors need, how concrete and timber floors differ, how to seal the pipes, cables and risers that pass through them, why the edge of the slab behind the façade is the detail most often missed, and what to do with older floors in conversions.
What are the fire separation requirements for floors?
It depends on what sits above and below, and on how tall the building is. In England the guidance comes from Approved Document B (ADB), in two volumes: one for dwellings, one for everything else.
Inside a single house, floors are not compartment floors. They still need fire resistance so the structure holds up and the stair stays usable, and in a typical two- or three-storey home that means REI 30: thirty minutes of loadbearing capacity, integrity and insulation. Plasterboard ceilings on ordinary joists usually achieve it, which is why a loft conversion often triggers work on the floor below.
Between flats the position changes. Every floor separating one flat from another, or a flat from a shop or car park, is a compartment floor, a fire barrier between separate occupancies. ADB sets the period by height:
- In most low and mid-rise blocks, up to a top floor of about 18 m, compartment floors need 60 minutes
- From about 18 m to 30 m, the figure rises to 90 minutes
- Above about 30 m, it reaches 120 minutes
- Very low buildings and some sprinklered commercial buildings can, in certain cases, accept less
That first band is the one most people mean when they search for 1 hour fire separation between floors. It covers the great majority of residential blocks in the country.
Offices, shops and other non-domestic buildings follow similar logic in Volume 2, with the period set by use and height and often reduced where sprinklers are fitted. A fire engineer working on a bespoke strategy may vary the figures again.
The rating belongs to the whole floor
One point needs stating plainly. A floor’s rating covers the full build-up: the slab or joists, any ceiling beneath, any screed above, and every hole cut through it. The figure on the drawing assumes all of those holes are sealed to the same standard.
A 60 minute floor with an unsealed 40 mm gap around a soil pipe is a 60 minute floor with a hole in it.
Which raises the obvious question: how do you seal the floors you have?
Fire protection between floors: concrete slab or timber joists?
Start with what the floor is made of, because concrete and timber fail in different ways and need different kinds of help.
A reinforced concrete slab of normal thickness resists fire well on its own. It does not burn, it holds heat back, and a slab designed for the job reaches 60 minutes or more without any ceiling beneath it. Its weak points are the holes: core holes for pipes, sleeves for cables, larger openings for risers and ductwork. Seal those properly and the slab does the rest.
Timber floors work the other way round. The joists burn, so the fire resistance comes mostly from the ceiling below, usually one or two layers of fire-rated plasterboard fixed to the joists or to resilient bars, sometimes with mineral wool between the joists as well. Separating floors between flats commonly use a tested system from a board manufacturer, with a stated ceiling build-up, screw spacing and insulation, and the rating holds only if every part of that system goes in as described.
That difference matters for anyone cutting holes. In a slab, a hole is a defect in the barrier itself. In a timber floor, the barrier is the ceiling, and every downlight, extractor and access panel cut into it opens the floor void to fire. Fire then spreads along the joists unseen.
Downlights are the commonest offender. A standard recessed light in a separating ceiling leaves a 70 to 90 mm hole straight into the void. Fire-rated downlights, or hoods fitted above standard ones, close that gap, but only if the fitting carries evidence for the ceiling type and rating involved.
Beam-and-block and other systems
Many newer houses and low-rise flats have floors of precast concrete beams with blocks between them, topped with a screed. These behave broadly like a slab, but the joints and the gaps at the ends of the beams need attention, and cutting through hollow blocks can leave voids around a service that a simple seal will not close. Lightweight steel and timber-frame systems each come with their own tested details, and the manufacturer’s guidance is the place to start.
Fire stopping between floors around pipes, cables and risers
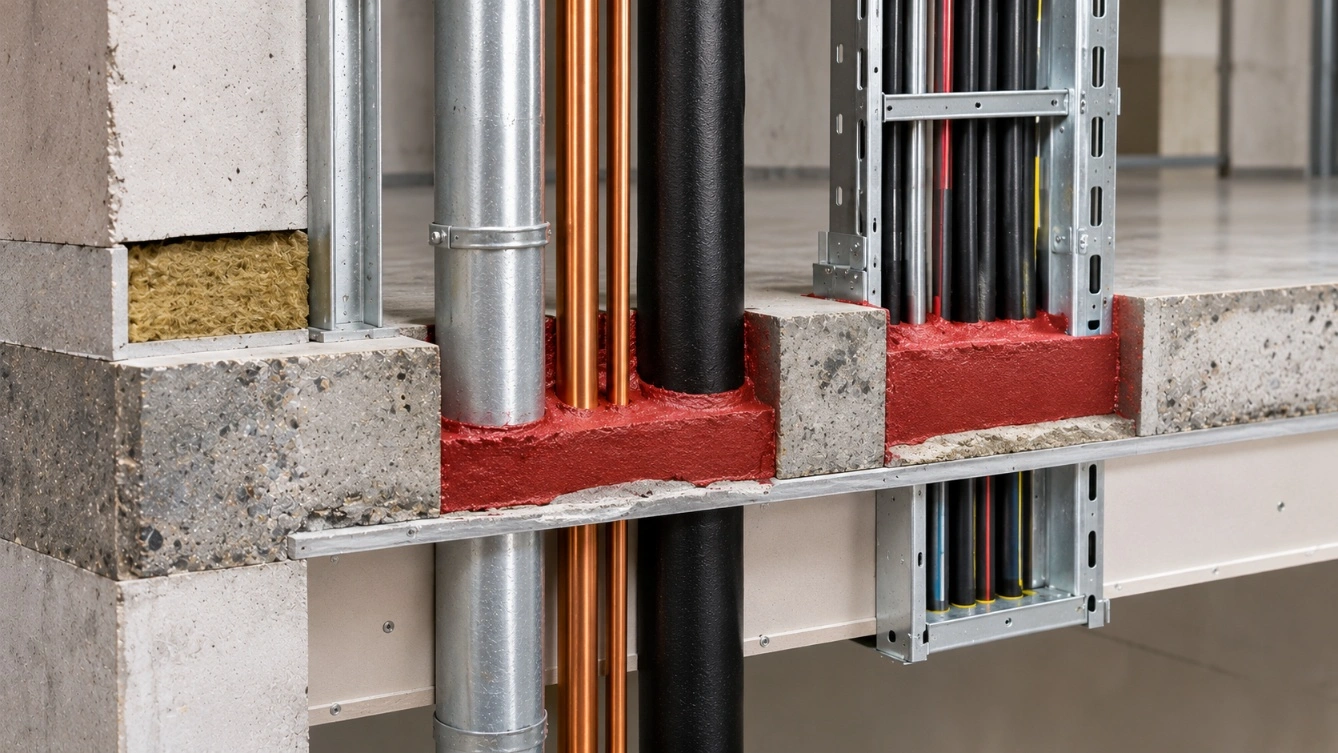
Floors take more services than walls do. Every soil stack, water main, heating flow, cable route and duct travelling up a building has to pass through each slab on its way, and every crossing needs a seal tested for a floor, not a wall. Floor seals face the fire from below, carry their own weight and sometimes foot traffic, and the evidence for them comes from separate tests under BS EN 1366-3.
The seal types themselves will be familiar from any fire stopping work. Plastic pipes take collars or wraps, which close the opening as the pipe softens. Metal pipes and cables take mastics, mortars or batts. Large openings take fire mortar or coated stone wool boards such as the Rockwool Ablative Coated Batt. Hilti, Quelfire, Nullifire and Promat all publish tested floor details.
Three floor-specific points trip people up.
Collars usually go on the underside of a slab, facing the likely fire, and the tested detail says which side. A collar fitted on top of the floor for convenience may sit in the wrong place entirely.
Soft seals cannot take weight. A coated batt filling a large opening in a floor looks solid, but it will not hold a person, and a seal that someone has stepped through is no seal at all. Where an opening sits in a walkable area, the tested solution is usually fire mortar or a batt with a supporting structure, never a bare batt.
Size limits are tighter. Floor tests often cap the opening size and the distance between services more strictly than wall tests do, so a detail that works for a 600 mm wall opening may not cover the same hole in a slab.
Risers: shaft or floor-by-floor?
A service riser running up through a building can be handled in two ways. One encloses the whole riser in fire-resisting walls with fire doors at each level, so it becomes a protected shaft, and the services inside need sealing only where they leave it. The other seals the riser at every floor, slab by slab, and treats the walls around it as ordinary partitions.
Both work. My view, and some services engineers will disagree, is that floor-by-floor sealing is the better default in residential blocks. Riser doors get left open, propped and damaged, and a sealed slab at every level does not depend on anyone remembering to shut anything. The counter-argument is access: floor seals have to be broken and remade whenever services change, and that only works if someone records each one properly.
If your building has risers left open at slab level because a future tenant might want to run cables through them, close them now with a removable tested seal such as fire pillows. An open riser is a chimney.
The slab edge: where floors meet the façade
Here is where most guides stop, and where fire separation between floors most often fails in modern buildings.
A compartment floor only works if it runs right through to the outside wall. On buildings clad with curtain walling, rainscreen panels or lightweight framing, the façade usually stands slightly off the edge of the slab, leaving a gap that runs the full perimeter of every floor. Sometimes it is 20 mm. Sometimes it is 150 mm or more. Left open, it forms a continuous slot through which fire and smoke can travel straight from one storey to the next without ever touching the floor itself.
Closing it needs a slab-edge barrier, typically compressed stone wool fixed between the slab and the façade, often topped with a smoke seal, and tested with the particular façade system it sits against. The barrier has to cope with the frame moving in wind and with the slab deflecting under load, which is why a generic offcut of insulation stuffed into the gap does not count.
This is the detail FireResist meets most often, since our fire-rated glazing and curtain walls sit exactly at that line. The pattern on site is consistent: the façade contractor assumes the fire stopping contractor will close the gap, the fire stopping contractor assumes it belongs to the façade package, and the slot stays open until somebody walks the floor with a torch. Put the slab edge in one package, on one drawing, with one name against it.
The façade has its own part to play above and below the slab too. Where the guidance requires it, the zone of the external wall between one floor and the next needs fire resistance as well, so that flames leaving a window cannot simply curl up into the storey above. Fire-rated spandrel panels and glazing handle that job where it applies.
Wall heads and floor junctions
The same logic applies inside. Where a compartment wall meets the underside of the slab above, the joint needs a tested head detail, often a deflection head that lets the slab move without crushing the wall, sealed with fire-rated material. A partition that stops at the ceiling grid instead of rising to the slab leaves the floor void open from one compartment to the next.
Fire separation between floors in conversions and older buildings
Turning a Victorian house into flats changes what its floors have to do. Under the building regulations it counts as a material change of use, and floors that once sat inside a single home become compartment floors between separate households.
The old floors rarely meet that standard as they stand. A typical period floor has timber boards on joists, with lath and plaster beneath, and nobody can put a reliable figure on how long it will hold. The usual remedy works from below: new fire-rated plasterboard fixed through to the joists, often two layers, with mineral wool between the joists. Sound insulation rules under Approved Document E usually demand similar work anyway, so the two upgrades are best planned together. In some smaller conversions, building control may accept 30 minutes for the floors where the escape routes meet the guidance in full, but expect to argue the case, not assume it.
Where the ceiling below is ornate or listed, tested systems that work from above, between the joists, can avoid touching it. They cost more and take longer.
The reassuring part: once the new ceiling goes up, an old floor can perform as well as a modern one. The rating comes from the tested ceiling system, not the age of the joists.
Where tested details run out
Now the limitation, stated honestly. Tested fire stopping details assume tidy, known construction: a slab of stated thickness, joists of stated size, a clean opening. Older buildings offer none of that. Floors vary room to room, previous owners have notched joists for pipes, and voids hide decades of abandoned cables. Many penetrations in a conversion will not match any manufacturer’s test, and the fallback is an engineering judgement, a written assessment that extends the test data to the case in front of you.
That is legitimate, but it is not a blank cheque. Each one applies to a single situation, and a project relying on dozens of them deserves a hard look from building control.
The bigger risk in occupied older buildings is simpler: out of sight, out of mind. Fire stopping between floors sits above ceilings and under floorboards, and every later trade that lifts a board or cuts a ceiling can undo it without anyone noticing. If you manage a converted building and have not looked at the floor voids since the last refurbishment, arrange it now, starting with kitchens and bathrooms where most services cross.
Getting fire stopping between floors right
On new work or a refurbishment, take it in this order.
- Confirm the period each floor needs from the fire strategy, building height and use.
- Identify the floor type: solid slab, beam-and-block, timber joists or a framed system.
- List every service that crosses each floor, and agree hole sizes and spacing before anyone cores a slab.
- Choose one manufacturer’s range and match a tested floor detail to each crossing, including risers.
- Assign the slab edge and the wall-head junctions to a named contractor, on a drawing.
- Seal before ceilings close, photograph every seal, and label it.
- Re-inspect after any later work that adds or moves services.
For a single flat refurbishment, that list may come down to a few collars, a mastic and a properly fixed ceiling. For a new block, it is a package of work with its own programme and its own inspector.
Taken as a whole, fire stopping between floors comes down to keeping each storey sealed from the next. The required period rises with the height of the building, from 30 minutes inside a typical house to 60 minutes between most flats and up to 120 in the tallest blocks, and it applies to the whole floor, holes included. Concrete slabs resist fire well and fail at their penetrations, while timber floors depend on the ceiling beneath and fail wherever that ceiling is cut. Floor seals need floor-tested details, the right side for collars, and real support where people may walk. The edge of the slab behind the façade and the junctions with compartment walls are the places most often missed, and conversions bring old floors into a role they were never built for. Plan the holes early, give every junction an owner, and keep a record, and the floors in your building will hold for as long as the drawings say.